
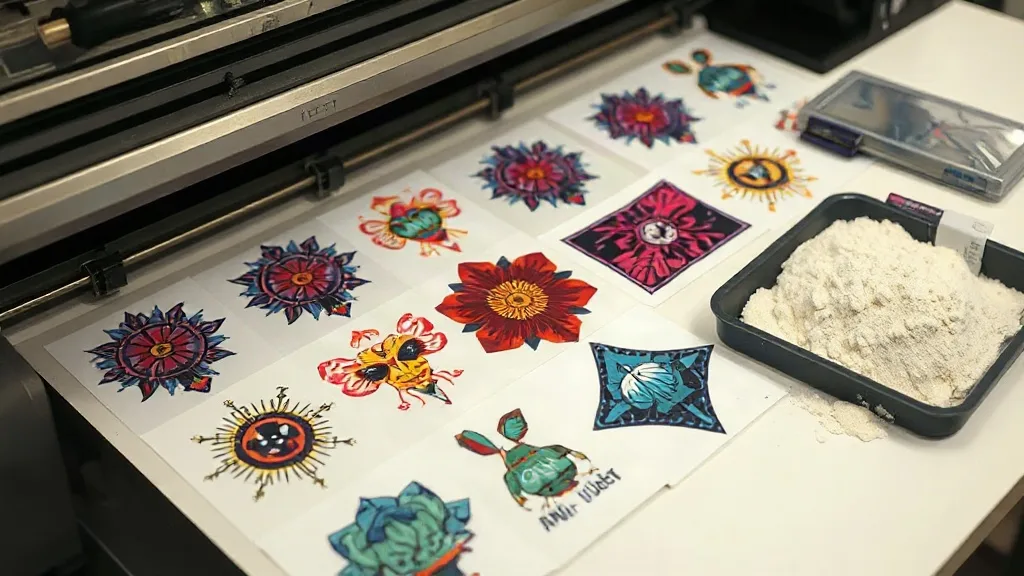
Every DTF printer knows the sting of a job that looks great but barely breaks even. You've dialed in your colors, the transfers peel perfectly, and the client is happy. Then you run the numbers and realize that between film, powder, ink, and labor, your profit margin is thinner than the adhesive on a cheap transfer. The culprit? Often it's not your pricing, it's how you build and use your DTF Gangsheet. In this guide, we'll walk through practical, field-tested ways to cut costs on every gangsheet without sacrificing an ounce of quality. These are the habits that separate profitable shops from busy ones.
Why Your Gangsheet Costs More Than It Should
Before we dive into fixes, let's look at where the money actually goes. A typical DTF gangsheet has four main cost centers: film, powder, ink, and labor. Most shops focus on getting the lowest price per sheet, but the real savings come from using less of each material per print. For example, a 13x19 sheet costs you the same whether it's half empty or packed, but the output value is drastically different. The goal is to maximize the number of sellable transfers per sheet while minimizing waste. That means rethinking everything from layout to powder application.
The Hidden Cost of Empty Space
Empty space on a gangsheet is money evaporating. If you're printing a batch of small left-chest logos, you could fit dozens on a single sheet. But if you nest them poorly, you might only get half that number. The film, powder, and ink used for the empty areas are pure loss. Similarly, if you're printing large back designs, the gaps between them can be filled with smaller items like sleeve prints or koozies. Always think: can I fill this gap with something I can sell? Even if it's a design you offer as a freebie or a sample, it adds value and reduces your per-unit cost.
Material Waste: Film, Powder, and Ink
Film waste happens when you trim too generously or use a sheet size that's too large for your design. Powder waste occurs when you apply too much or don't reclaim the excess. Ink waste comes from over-saturating prints or not profiling your printer correctly. Each of these adds up. For instance, using a 13x19 sheet for a design that only needs 11x17 means you're paying for two extra inches of film on every print. Over a hundred sheets, that's significant. The same goes for powder: a little goes a long way, and reclaiming excess powder can cut your usage by 20% or more.
Smart Nesting: The Biggest Lever for Cost Reduction
Nesting is the art of arranging designs on a sheet to minimize wasted space. It's the single most effective way to reduce costs because it directly impacts how many transfers you get per sheet. Good nesting can increase your yield by 30% or more, which drops your per-transfer cost dramatically. But it's not just about rotating rectangles; it's about understanding your product mix and planning ahead.
Manual vs. Software Nesting
Many small shops start with manual nesting using design software like Photoshop or Illustrator. While it's free, it's time-consuming and often inefficient. Dedicated nesting software (like TNP or gangsheet builders) can automatically arrange designs for maximum density. The time saved alone often justifies the cost, but the material savings are the real win. If you're doing high volume, invest in software. If you're just starting, learn manual tricks like grouping similar sizes and using irregular shapes to fill gaps.
Grouping by Size and Shape
One of the easiest nesting strategies is to group designs by size. Print all your small logos together, all your medium prints together, and all your large backs together. This way, you can use sheet sizes that match the group, minimizing leftover space. For example, if you have a batch of 3-inch logos, you can fit hundreds on a single 13x19 sheet. But if you mix them with 12-inch back designs, you'll waste a lot of film. Also, consider the shape: circular designs can be nested closer together than rectangular ones if you rotate them properly.
Using Templates for Repeat Orders
If you have recurring orders, create templates. Once you find a layout that works perfectly for a set of designs, save it. Next time that order comes in, you can load the template and print immediately. This saves time and ensures you're not reinventing the wheel. Templates also help maintain consistency, which is crucial for quality control. Plus, you can tweak templates slightly to accommodate new designs without starting from scratch.
Film and Powder: Small Changes, Big Savings
Film and powder are consumables that you buy over and over. Small efficiencies here compound quickly. Start by choosing the right film for the job. Not all films are created equal; some have better release properties, allowing you to use less powder. Others are thinner, which can reduce costs per sheet. But don't sacrifice quality for price; a cheap film that causes transfer failures will cost you more in reprints.
Choosing the Right Film Size
Stock multiple film sizes: 8.5x11, 11x17, 13x19, and maybe a roll if you do large volumes. Using a smaller sheet for small jobs reduces waste. For example, if you're printing a single small logo, use an 8.5x11 sheet instead of a 13x19. The savings on film and powder add up. Also, consider buying film in bulk to get discounts, but only if you have the storage space and will use it before it expires. Film can degrade over time, so don't overstock.
Powder Application Techniques
Powder is often overused. The goal is to coat the wet ink evenly with a thin layer. Too much powder leads to a rough feel and wasted material. Use a powder shaker with a fine mesh, and apply in a circular motion. After shaking, gently tap off excess onto a reclaim tray. You can reuse this powder if it's clean. Also, control humidity in your shop; high humidity makes powder clump and stick, leading to waste. A dehumidifier can help.
Reclaiming Excess Powder
Set up a reclaim station. After applying powder, hold the film over a tray and gently shake off the excess. Use a soft brush to remove powder from the edges. Collect this powder and sift it through a fine mesh before reusing. This can save you 10-20% on powder costs. Just make sure the reclaimed powder is free of contaminants like dust or dried ink particles.
Ink Efficiency: Profiling and Maintenance
Ink is one of the most expensive components, but it's also where you can save the most by ensuring your printer is optimized. Proper color profiles and maintenance prevent waste from misprints and clogs.
Proper Color Profiling
If your colors are off, you're likely over-inking to compensate. A proper ICC profile ensures that your printer lays down the right amount of ink for accurate colors. This not only saves ink but also reduces powder usage because less ink means less powder needed. Invest in a spectrophotometer or hire a professional to create profiles for your printer and ink combination. It's a one-time cost that pays for itself quickly.
Regular Maintenance to Avoid Clogs
Clogged nozzles lead to wasted ink and film. Implement a daily maintenance routine: clean the printhead, check for clogs with a test print, and store ink properly. Use a humidifier to keep the printhead from drying out. Also, run your printer at least a few times a week to keep ink flowing. If you're going on vacation, follow the manufacturer's storage procedures.
Batch Printing to Reduce Cleaning Cycles
Every time you start a print job, the printer may go through a cleaning cycle, using ink. By batching jobs and printing gangsheets back-to-back, you reduce the number of cleaning cycles. Plan your production so that you print multiple sheets in one session, ideally with similar color requirements. This also saves time.
Labor and Workflow: The Invisible Costs
Labor is often overlooked, but time is money. Streamline your workflow to reduce the time spent per gangsheet. This includes file preparation, printing, powdering, and curing. A well-organized shop can produce more sheets per hour, lowering the labor cost per transfer.
Standardizing File Prep
Create a checklist for file prep: check resolution, color mode, and dimensions. Use templates for common sizes. Automate where possible with actions or scripts in your design software. This reduces errors and rework. Also, organize your files with clear naming conventions so you can find and reuse designs quickly.
Organizing Your Print Queue
Group similar jobs together. If you have multiple orders that use the same film size and similar colors, print them in one session. This minimizes setup time and material changes. Use a whiteboard or software to track orders and prioritize.
Training Staff on Cost-Saving Habits
Everyone in your shop should understand the cost implications of their actions. Train them to nest efficiently, apply powder sparingly, and report any issues that cause waste. Empower them to suggest improvements. A team that cares about costs will save you more than any single technique.
Frequently Asked Questions
How can I reduce film waste on small orders?
Use smaller film sizes like 8.5x11 for small designs instead of cutting down a larger sheet. Also, nest small designs together with other jobs to fill the sheet. If you must use a larger sheet, fill the empty space with sample designs or common sizes that you can sell later.
What's the best way to save on DTF powder?
Apply powder with a fine mesh shaker in a thin, even layer, and reclaim excess by shaking over a tray. Reuse reclaimed powder after sifting. Control humidity to prevent clumping. Also, ensure your ink layer is not too heavy; excess ink requires more powder.
Does nesting software really pay for itself?
Yes, for most shops doing regular gangsheets. Software can increase yield by 20-30%, which directly reduces film, powder, and ink costs per transfer. It also saves time. Calculate your monthly gangsheet usage: if you print more than 50 sheets a month, the savings likely justify the investment.
How often should I profile my printer?
Profile your printer whenever you change ink brand, film type, or after major maintenance. Otherwise, once a year is sufficient. If you notice colors drifting, re-profile. Proper profiling ensures you're not over-inking, which saves money.
Can I reuse film?
No, DTF film is single-use. Once printed and powdered, the film is cured and peeled off. Reusing film would compromise transfer quality. However, you can recycle film scraps where facilities exist.